Onboarding Procedure
Introduction
The image “phytec-connagtive-start-image.sdcard“is installed on eMMC out of the box. It contains the following software components:
Software components | Description |
awsclient | Connects to the connagtive IoT device suite platform and manages the device's shadow state and configuration files |
RAUC | Update client operating on the device; installs update bundles |
rauc-hawkbit-updater | Acts as a communication bridge between the hawkBit server hosting update bundles and RAUC |
remotemanager | IoT device suite client to access the device remotely via SSH |
phytec-board-config | Tool to add a device to the connagtive IoT device suite and creating new accounts |
phytec-board-info | Outputs general information about the device |
Onboarding Device to IoT Suite
Once the device is powered on, you will see a welcome message, and also the state of the onboarding to the IoT device platform is shown.
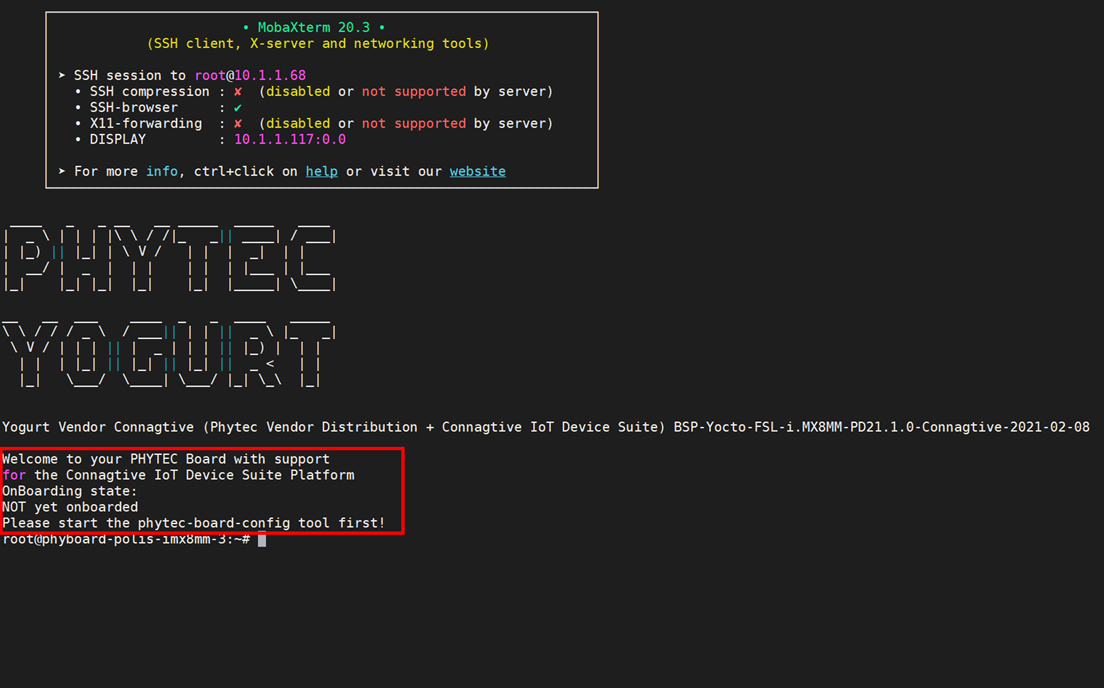
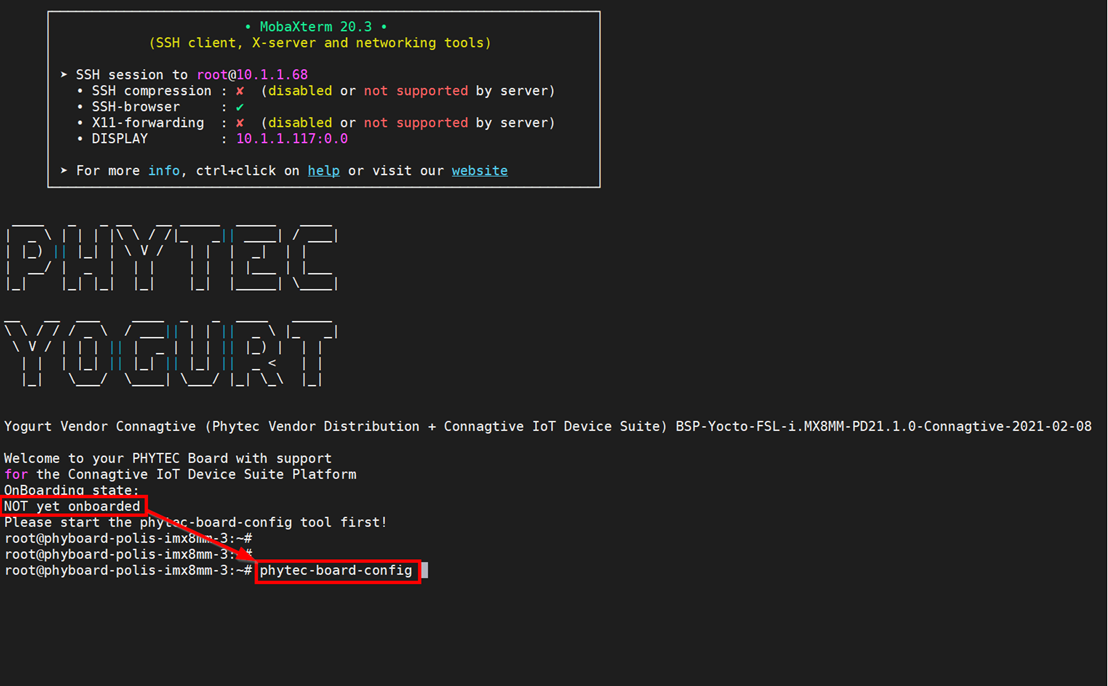
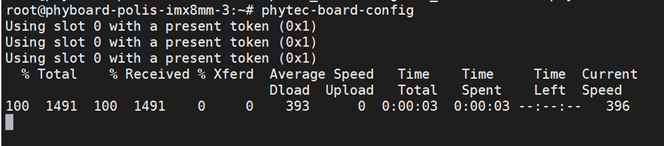
2. To use the IoT device platform, a customer account must be created. For this, we can “phytec-board-config” tool and which supports both Graphical User Interface (GUI) or Command-Line (CLI) arguments.
Using Graphical User Interface
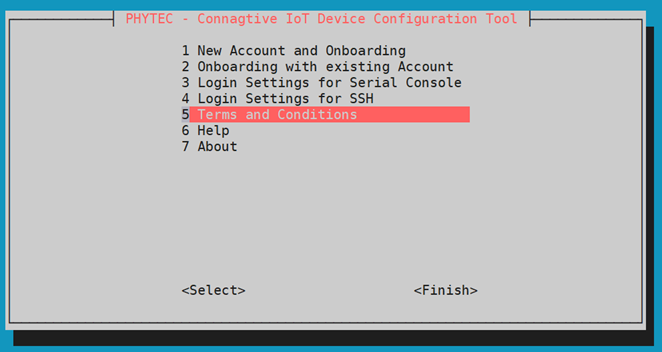
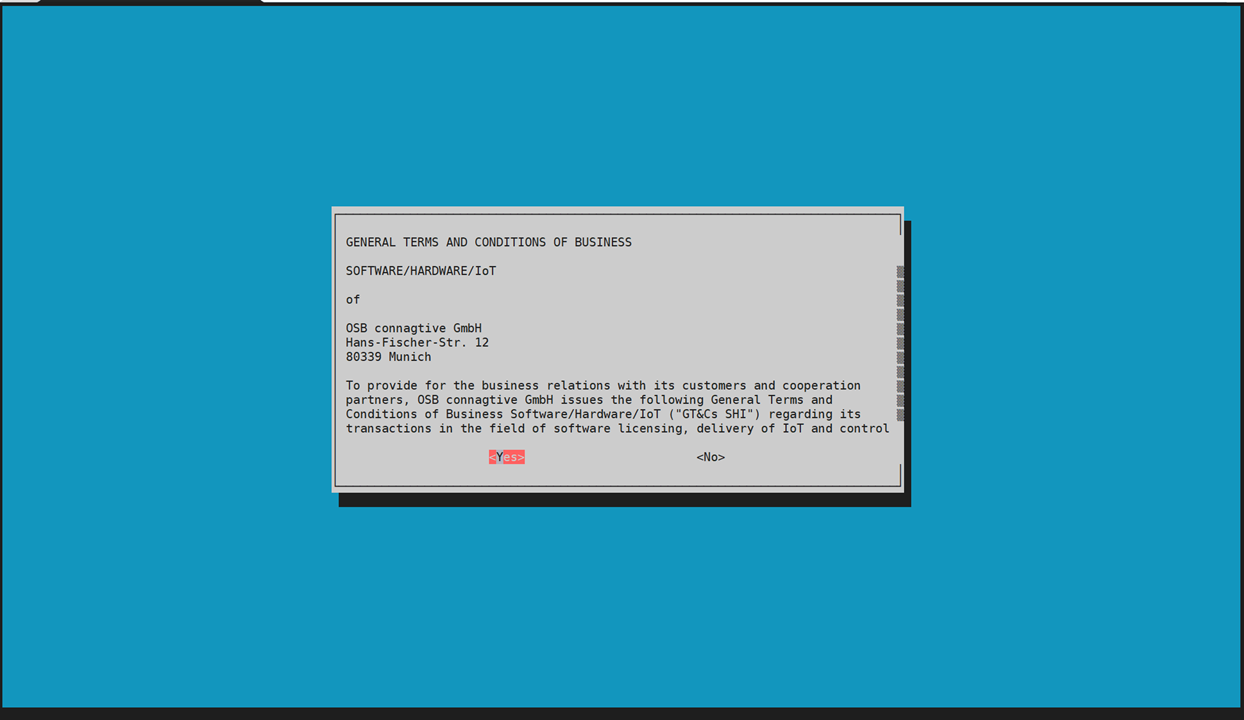
3. This opens a GUI inside your terminal with the following options. Navigate to different fields using arrow keys. The “Terms and Conditions” has to be accepted before creating new a account. If you decline the terms and conditions, the connagtive IoT device suite cannot be used.
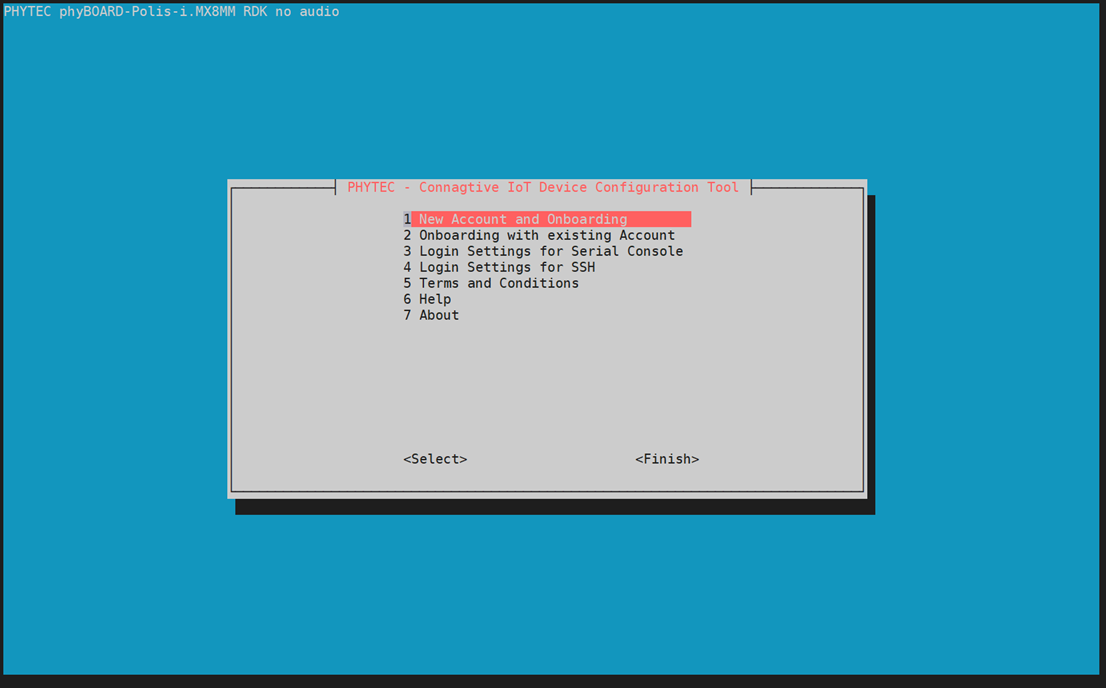
4. Select "New Account and Onboarding". And enter a valid email address.
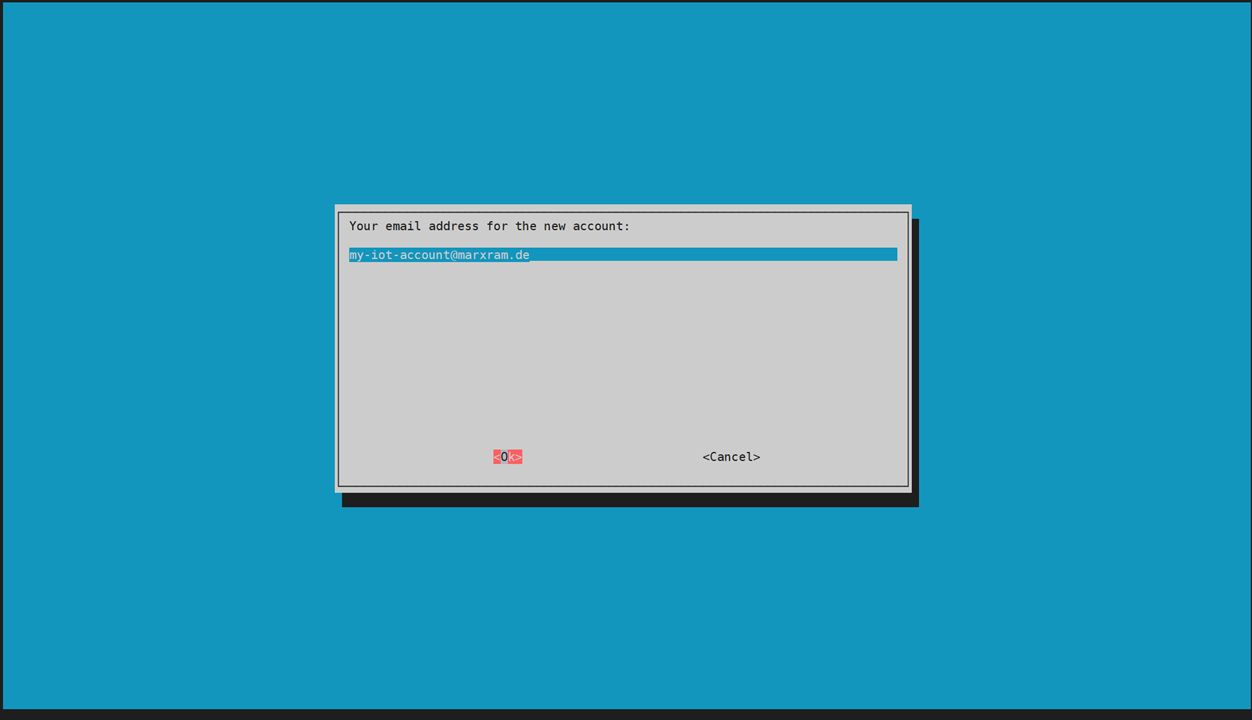
The “phytec-board-config” tool will request a token from the connagtive IoT device suite to assign your device to the new account. If the token was successfully fetched, the following screen appears:

5. To complete the registration of your device:
a. Check your e-mail address for a new message from “welcome@iot-suite.io”
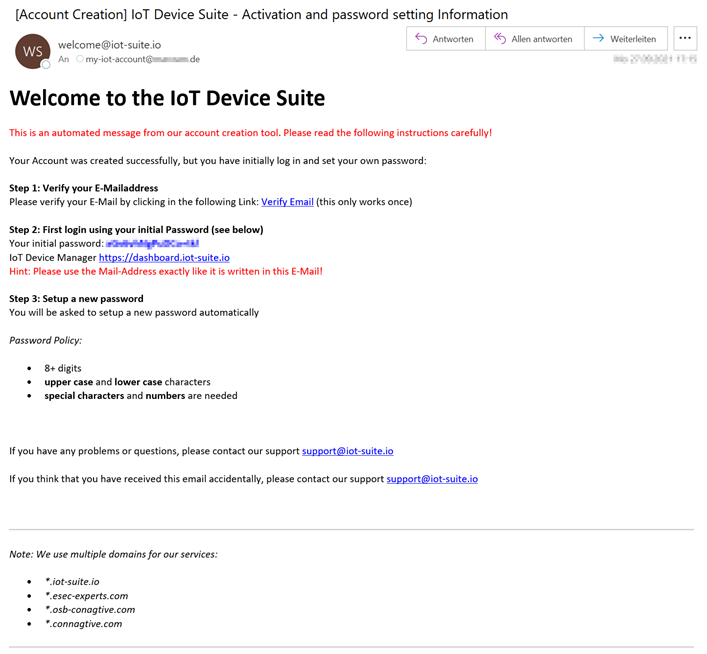
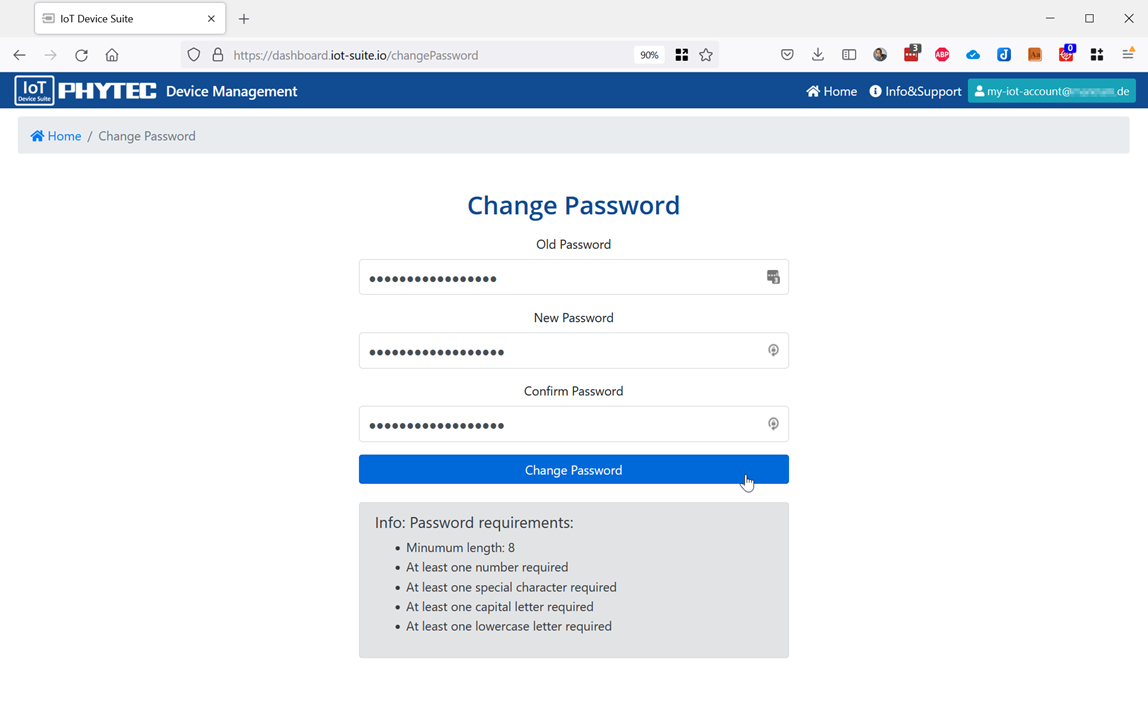
b. Verify your e-mail address with the message you just received. And update your password.
Go to the link:

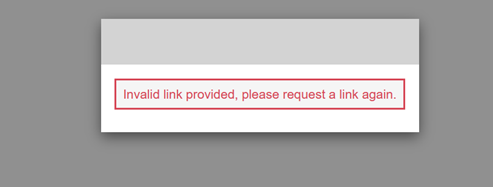
Only works once! Next time it would look like this:
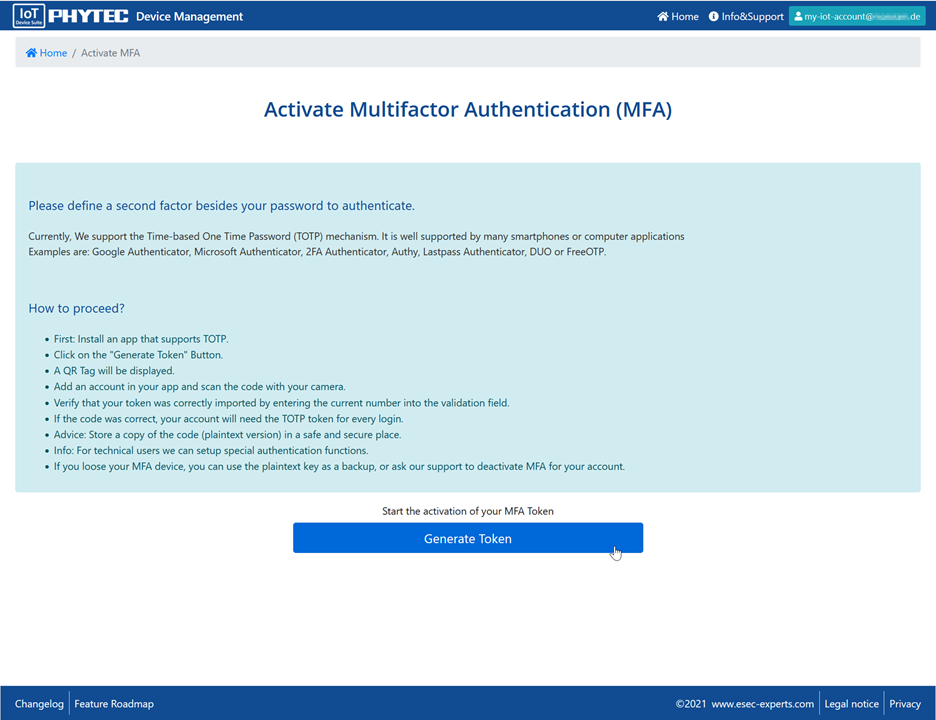
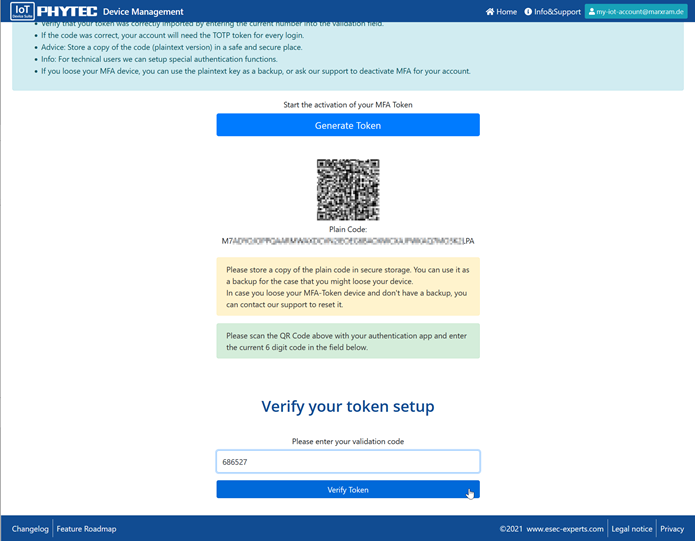
Activate the Multi-Factor Authentication
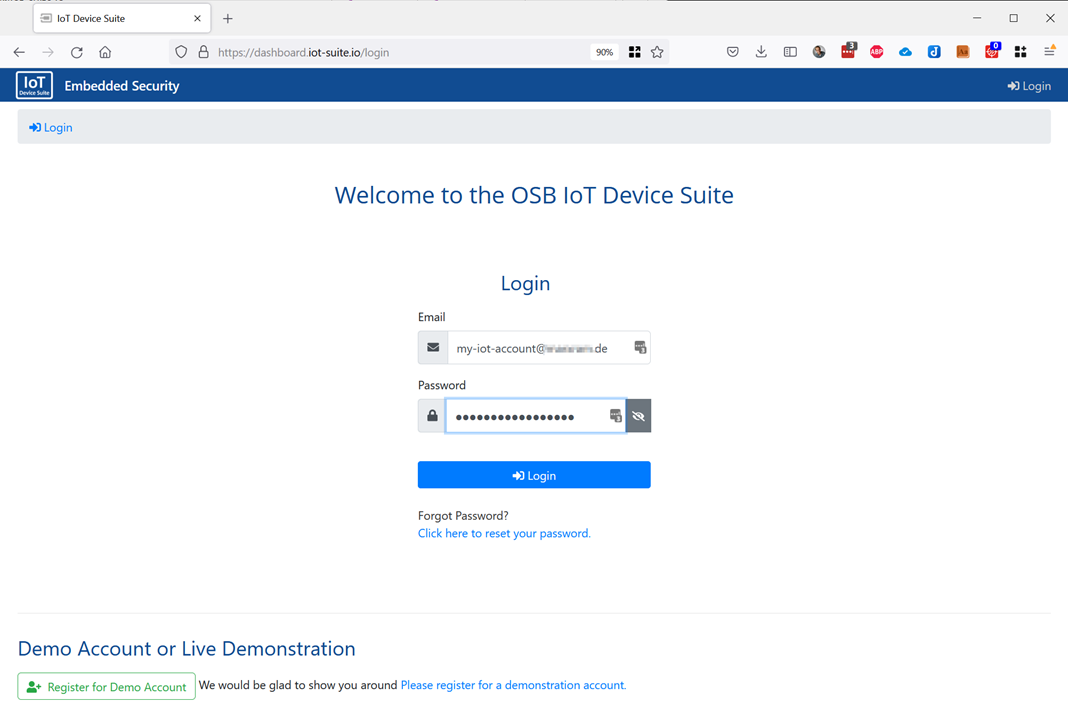
c. Login to the IoT device suite at https://phytec.iot-suite.io/login
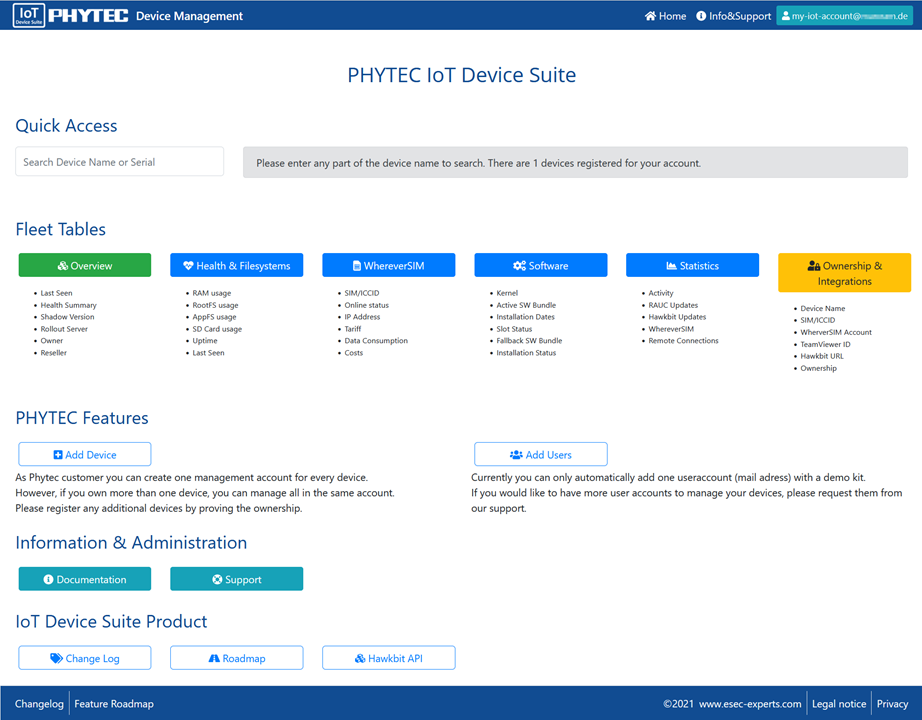
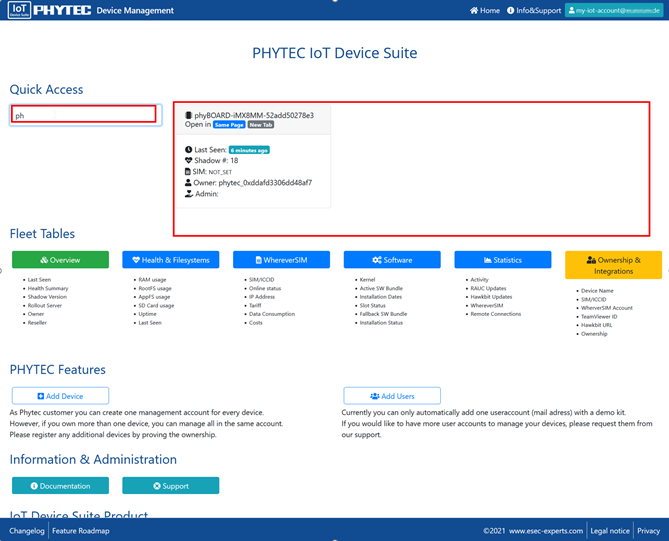
d. Check the state of your phyBOARD in the IoT Device Suite platform.
Using Command-Line Argument
To create an account and register the device via the command line, execute the following:
phytec-board-config acceptcontract --newaccount=myemail@company.com
Note: When using this command, you will not get instructions on how to proceed further to complete your registration. Using the non-interactive command-line arguments is mainly meant for use in automated scripts.
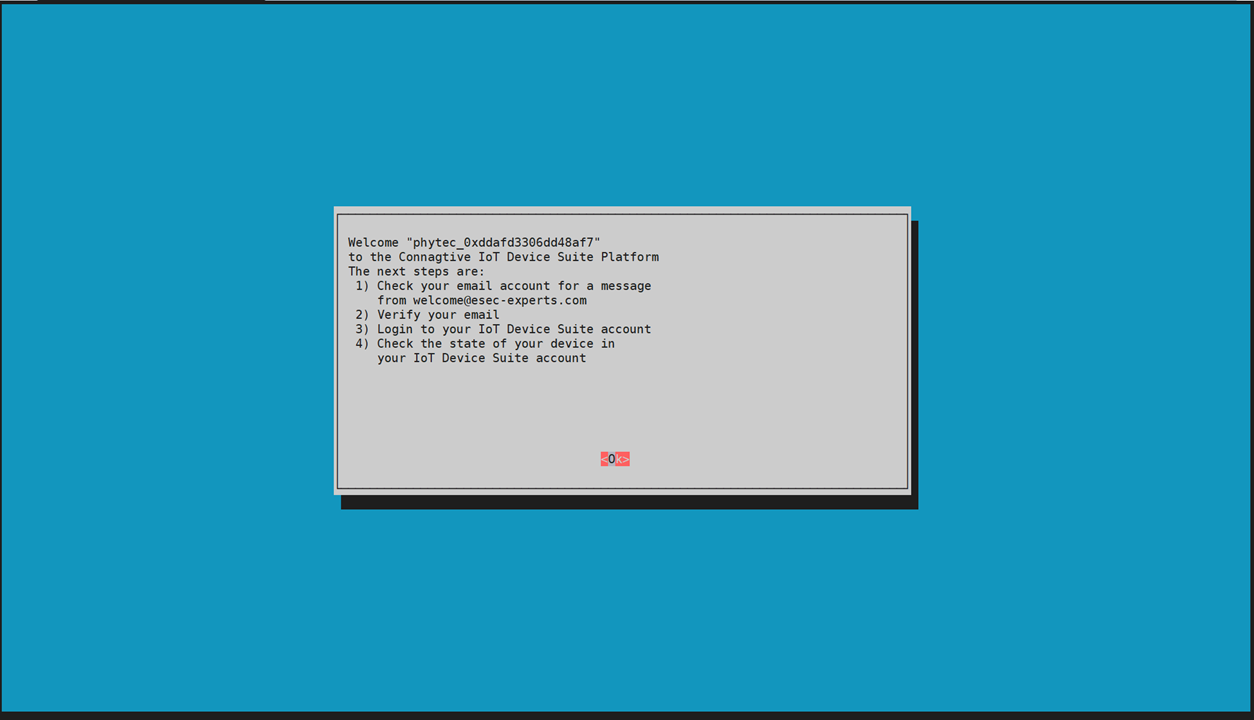
After successful onboarding, you can check the status in the welcome message on the device:

Login Settings
One way of improving the security of your device is to use one-time passwords (OTP), instead of static passwords which may get leaked. Another advantage and possible use-case are that one-time passwords allow for giving a person one-time access to your device, e.g. when servicing it in the field.
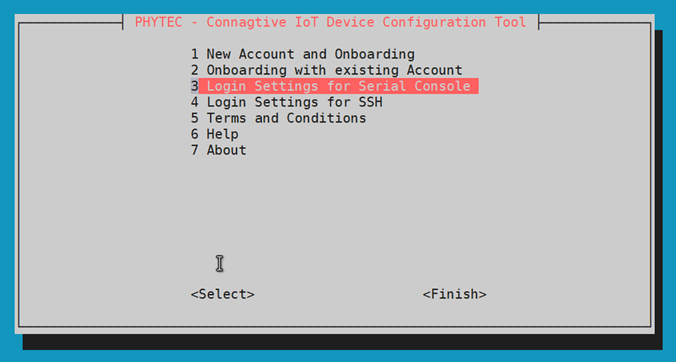
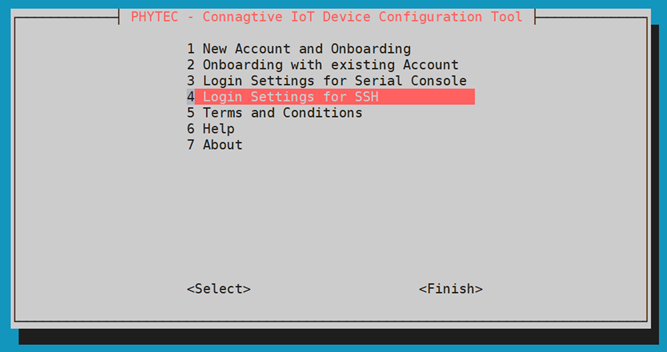
To change the login settings start the “phytec-board-config” tool and select which login settings you want to change, either "Serial Console" or "SSH".
Login Setting for Serial Console
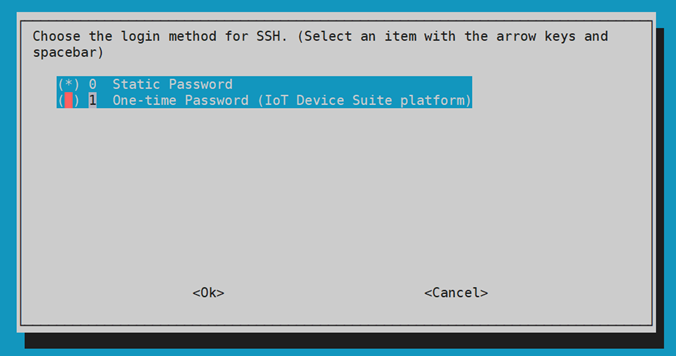
To select the login settings in the “phytec-board-config” tool use the arrow keys and space bar. After you choose your verification method press "enter" to exit.
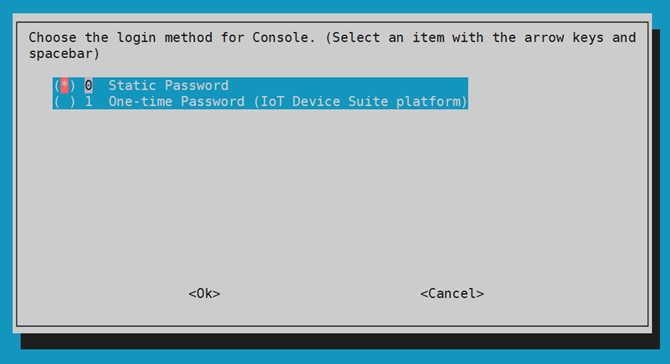
The currently active method is marked with an asterisk * in the list.
Login Setting for SSH
Password verification method
For access to the device via serial console or SSH, you have to enter a device-specific password:
User: root
Password: root plus the device's MAC address in upper case letters, e.g. root502DF4010203Connagtive Authentication method
Using the connagtive IoT device suite platform you can generate a one-time password (OTP) to gain access to the device.
Note: If you change the login settings via the “phytec-board-config” tool, those changes are only valid until a new bundle or image is installed.
Getting Started in the GUI
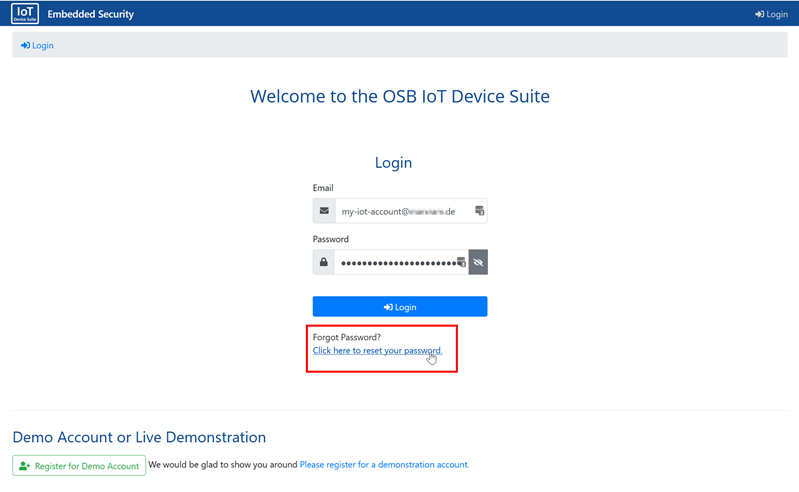
Forgot the password?
Select the “Forgot Password?” option and enter your email address
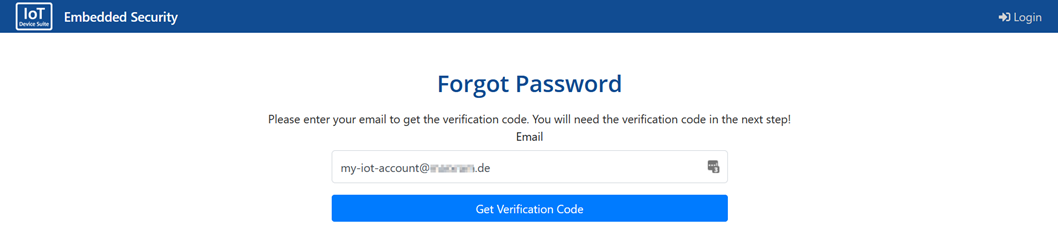
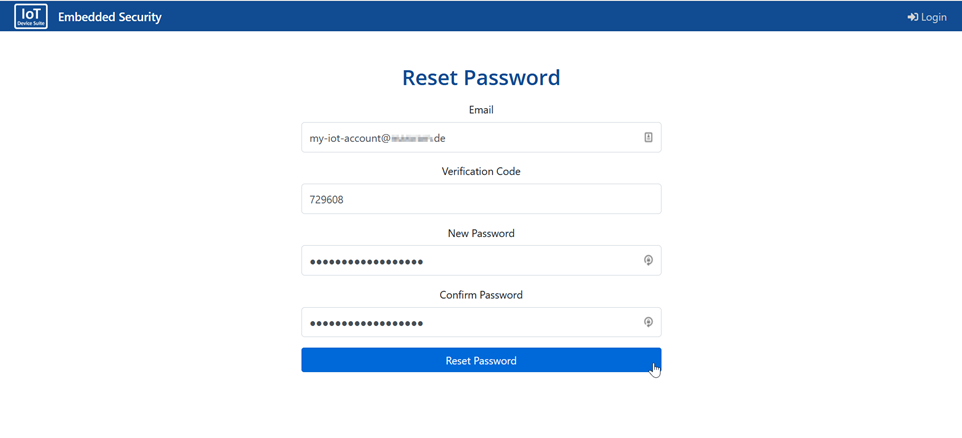
Enter the received “verification code” and set the new password.
Generating a One-time Password
To generate a one-time password for logging in to your device, go to the "Overview" section and select the device for which you want to generate a token. Select the tab "Remote Access".
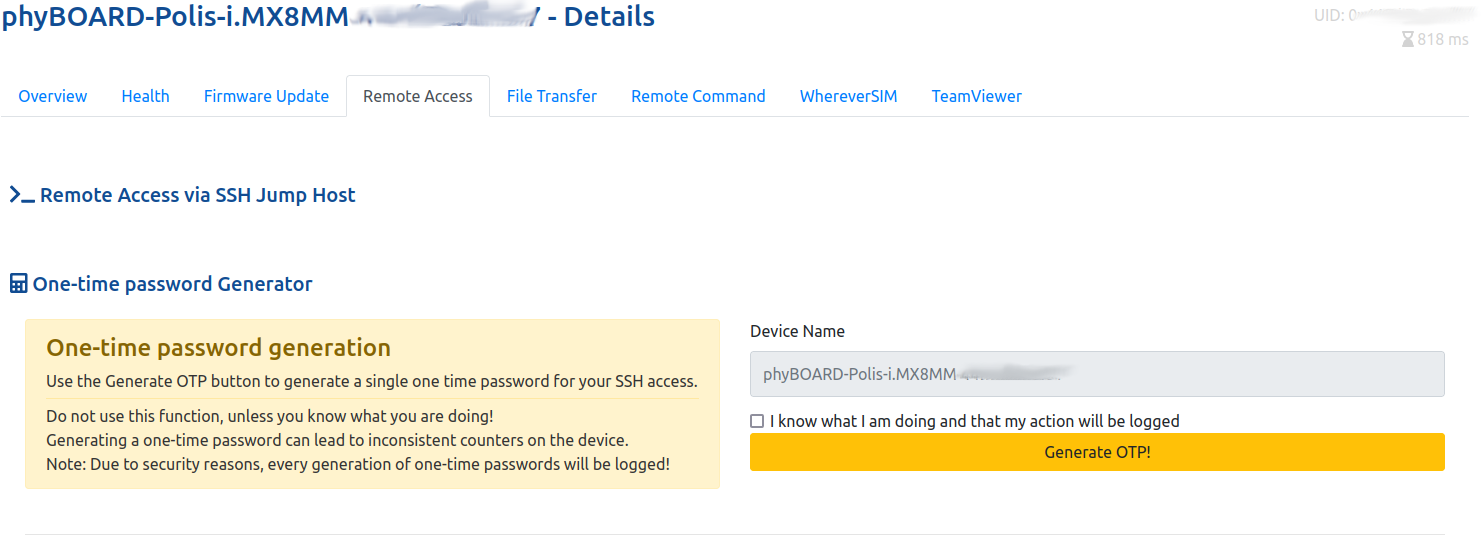
Check the box "I know what I am doing and that my action will be logged" (if you truly do) and click on "Generate OTP!". This will generate a one-time password you can use to log in on your device if the login settings are set accordingly.
Using the Remote Manager and Logging in via SSH
A device can be accessed from everywhere via the "Remote Manager" feature of the connagtive IoT device suite platform. To use the "Remote Manager" you have to set up a "Tunnel" from the platform to the device. Login to your connagtive IoT device suite account and select the device you want to connect to. Select the tab "Remote Access" and scroll down to "Remote Access Activation and Settings"
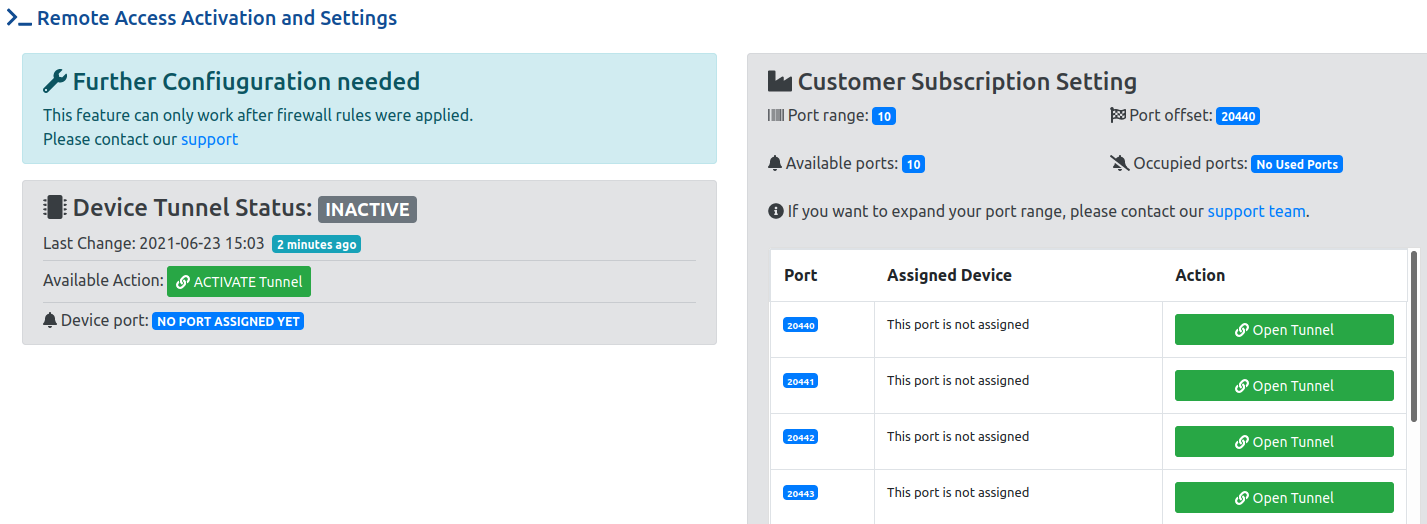
And click on the “Activate Tunnel” option in the “Device Tunnel Status” section. On the device, the “remotemanager” IoT-Suite client is started and an SSH connection to the Connagtive IoT Device Suite platform is established.
Note: To use the “Remote Manager”, the public IP range of your PC must be registered in the connagtive IoT device suite platform. For this, please contact the connagtive support team at support@iot-suite.io
Then you can remotely access the device by executing:
host$ ssh root@IP_ADDRESS -p PORT
The service on the connagtive IoT device suite platform checks the IP range from the connecting PC and starts the port forwarding to the device.
Updating Devices from the Connagtive IoT Device Suite
To update your device, log in to your Connagtive IoT Device Suite account and go to "Overview". Select the device you want to update. Click on the tab "Firmware Update".
You will find all the available software bundles ready to be deployed to the device under the “Available Software Images” section. Select the bundle you want to download and install and press the button "Deploy to Device". The progress of the deployment is displayed under the "Firmware Update Log" section.
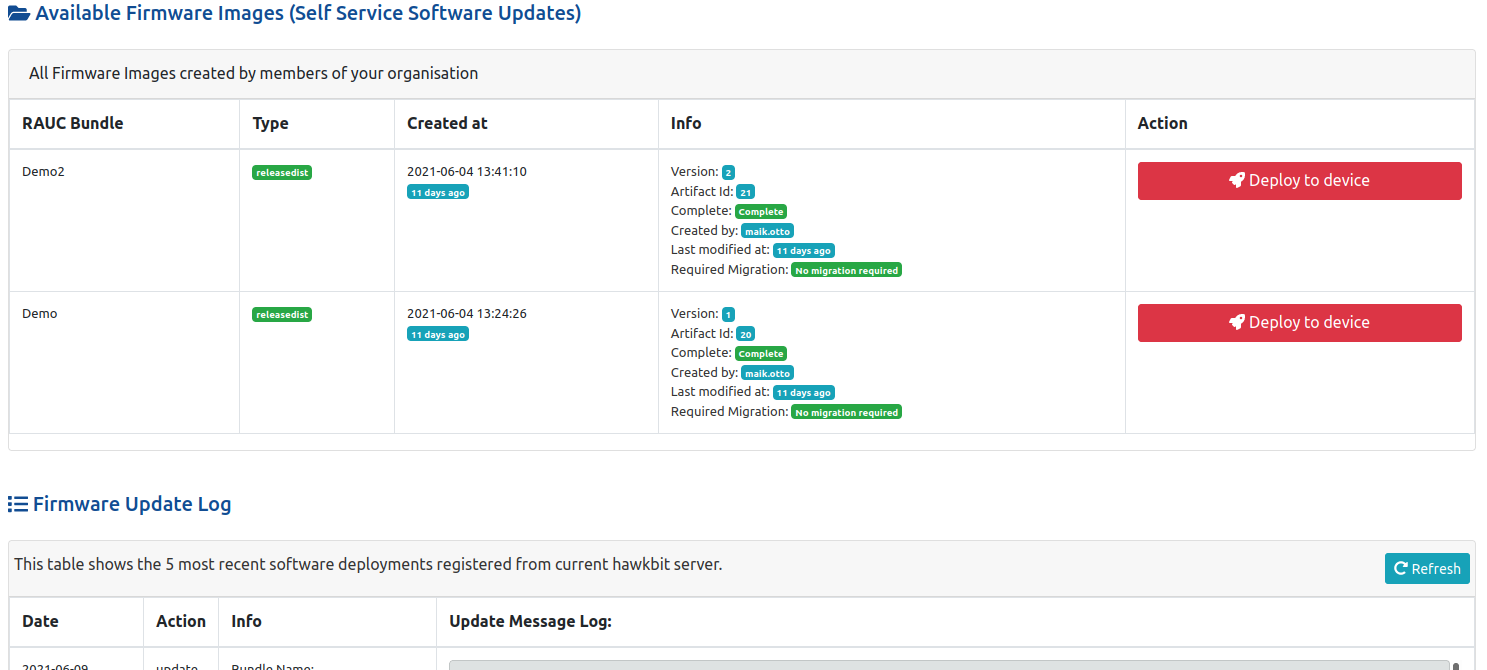
Note: You may need to press the refresh button to see new logs of the current deployment. A detailed procedure to update your device can be found here Update the Firmware
Once the bundle is downloaded and installed, the device must be rebooted to switch to the updated partition. This could be done either by “hardware Reset” or “Software Rebooting”.
Note: Additionally, an automatic reboot after the successful update is supported by the “rauc-hawkbit-updater” IoT-Suite client. Please contact support@iot-suite.io to enable this configuration.
Uploading RAUC Bundles to Connagtive IoT Device Suite
Currently, it is not possible to directly upload a bundle to the connagtive IoT device suite UI for demo accounts. To upload a custom bundle, contact our support at support@iot-suite.io or support@phytec.de.
When using a productive version of the IoT device suite, you can directly interact with the hawkBit server and upload bundles to the hawkBit server. Then, the bundles can be deployed using a connagtive IoT device suite.
Contact
If you have any questions, please reach out to us at support@iot-suite.io and support@phytec.de